Recent Posts

Showing posts with label Windows Xp tricks. Show all posts

How to check graphic card memory in Window XP

0

How to check graphic card memory in Window XP

Checking graphic card memory in Window XP is quite easy. Follow the below step

  • Right click on any empty space on your Window XP desktop and then click on Properties
  • Now click on the Settings Tab and Click the Advanced button.
  • Now click on the Adapter Tab.
  • There you will see Memory Size : xxxMB. [ See the Screen Shot Below]
  • That is your Graphics Memory.

ALL CMD COMMANDS

0

Run Commands In Windows XP


You can access all these programs by going
through START-->RUN or Simply Click Windows
Key+R 
  • SQL Client Configuration - cliconfg
  • System Configuration Editor - sysedit
  • System Configuration Utility - msconfig
  • System File Checker Utility (Scan Immediately)-
  • sfc /scannow
  • System File Checker Utility (Scan Once At Next Boot)- sfc /scanonce
  • System File Checker Utility (Scan On Every Boot)
  • - sfc /scanboot
  • System File Checker Utility (Return to Default
  • Setting)- sfc /revert
  • System File Checker Utility (Purge File Cache)- sfc /purgecache
  • System File Checker Utility (Set Cache Size to size
  • x)-sfc/cachesize=x
  • System Information - msinfo32.
  • Task Manager – taskmgr
  • System Properties - sysdm.cpl Task Manager – taskmgr
  • TCP Tester - tcptest
  • Telnet Client - telnet
  • Tweak UI (if installed) - tweakui
  • User Account Management- nusrmgr.cpl
  • Utility Manager - utilman Windows Address Book - wab
  • Windows Address Book Import Utility - wabmig
  • Windows Backup Utility (if installed)- ntbackup
  • Windows Explorer - explorer
  • Windows Firewall- firewall.cpl
  • Windows Magnifier- magnify Windows Management Infrastructure -
  • wmimgmt.msc
  • Windows Media Player - wmplayer
  • Windows Messenger - msmsgs
  • Windows Picture Import Wizard (need camera
  • connected)- wiaacmgr Windows System Security Tool – syskey
  • Windows Update Launches - wupdmgr
  • Windows Version (to show which version of
  • windows)- winver
  • Windows XP Tour Wizard - tourstart
  • Wordpad - write Password Properties - password.cpl
  • Performance Monitor - perfmon.msc
  • Phone and Modem Options - telephon.cpl
  • Phone Dialer - dialer
  • Pinball Game - pinball
  • Power Configuration - powercfg.cpl Printers and Faxes - control printers
  • Printers Folder – printers
  • Private Character Editor - eudcedit
  • Quicktime (If Installed)- QuickTime.cpl
  • Real Player (if installed)- realplay
  • Regional Settings - intl.cpl Registry Editor - regedit
  • Registry Editor - regedit32
  • Remote Access Phonebook - rasphone
  • Remote Desktop - mstsc
  • Removable Storage - ntmsmgr.msc
  • Removable Storage Operator Requests - ntmsoprq.msc
  • Resultant Set of Policy (XP Prof) - rsop.msc
  • Scanners and Cameras - sticpl.cpl
  • Scheduled Tasks - control schedtasks
  • Security Center - wscui.cpl
  • Services - services.msc Shared Folders - fsmgmt.msc
  • Shuts Down Windows - shutdown
  • Sounds and Audio - mmsys.cpl
  • Spider Solitare Card Game - spider
  • Malicious Software Removal Tool - mrt
  • Microsoft Access (if installed) - access.cpl Microsoft Chat - winchat
  • Microsoft Excel (if installed) - excel
  • Microsoft Frontpage (if installed)- frontpg
  • Microsoft Movie Maker - moviemk
  • Microsoft Paint - mspaint
  • Microsoft Powerpoint (if installed)- powerpnt Microsoft Word (if installed)- winword
  • Microsoft Syncronization Tool - mobsync
  • Minesweeper Game - winmine
  • Mouse Properties - control mouse
  • Mouse Properties - main.cpl
  • Nero (if installed)- nero Netmeeting - conf
  • Network Connections - control netconnections
  • Network Connections - ncpa.cpl
  • Network Setup Wizard - netsetup.cpl
  • Notepad - notepad
  • Nview Desktop Manager (If Installed)- nvtuicpl.cpl
  • Object Packager - packager
  • ODBC Data Source Administrator- odbccp32.cpl
  • On Screen Keyboard - osk
  • Opens AC3 Filter (If Installed) - ac3filter.cpl
  • Outlook Express - msimn Paint – pbrush
  • Keyboard Properties - control keyboard
  • IP Configuration (Display Connection
  • Configuration) - ipconfi/all
  • IP Configuration (Display DNS Cache Contents)-
  • ipconfig /displaydns IP Configuration (Delete DNS Cache Contents)-
  • ipconfig /flushdns
  • IP Configuration (Release All Connections)-
  • ipconfig /release
  • IP Configuration (Renew All Connections)-
  • ipconfig /renew IP Configuration(RefreshesDHCP&Re-
  • RegistersDNS)-ipconfig/registerdns
  • IP Configuration (Display DHCP Class ID)-
  • ipconfig/showclassid
  • IP Configuration (Modifies DHCP Class ID)-
  • ipconfig /setclassid Java Control Panel (If Installed)- jpicpl32.cpl
  • Java Control Panel (If Installed)- javaws
  • Local Security Settings - secpol.msc
  • Local Users and Groups - lusrmgr.msc
  • Logs You Out Of Windows - logoff.....
  • Accessibility Controls - access.cpl Accessibility Wizard - accwiz
  • Add Hardware - Wizardhdwwiz.cpl
  • Add/Remove Programs - appwiz.cpl
  • Administrative Tools control - admintools
  • Adobe Acrobat (if installed) - acrobat
  • Adobe Designer (if installed)- acrodist Adobe Distiller (if installed)- acrodist
  • Adobe ImageReady (if installed)- imageready
  • Adobe Photoshop (if installed)- photoshop
  • Automatic Updates - wuaucpl.cpl
  • Bluetooth Transfer Wizard – fsquirt
  • Calculator - calc Certificate Manager - certmgr.msc
  • Character Map - charmap
  • Check Disk Utility - chkdsk
  • Clipboard Viewer - clipbrd
  • Command Prompt - cmd
  • Component Services - dcomcnfg Computer Management - compmgmt.msc
  • Control Panel - control
  • Date and Time Properties - timedate.cpl
  • DDE Shares - ddeshare
  • Device Manager - devmgmt.msc
  • Direct X Control Panel (If Installed)- directx.cpl Direct X Troubleshooter- dxdiag
  • Disk Cleanup Utility- cleanmgr
  • Disk Defragment- dfrg.msc
  • Disk Management- diskmgmt.msc
  • Disk Partition Manager- diskpart
  • Display Properties- control desktop Display Properties- desk.cpl
  • Display Properties (w/Appearance Tab
  • Preselected)- control color
  • Dr. Watson System Troubleshooting Utility-
  • drwtsn32
  • Driver Verifier Utility- verifier Event Viewer- eventvwr.msc
  • Files and Settings Transfer Tool- migwiz
  • File Signature Verification Tool- sigverif
  • Findfast- findfast.cpl
  • Firefox (if installed)- firefox
  • Folders Properties- control folders Fonts- control fonts
  • Fonts Folder- fonts
  • Free Cell Card Game- freecell
  • Game Controllers- joy.cpl
  • Group Policy Editor (XP Prof)- gpedit.msc
  • Hearts Card Game- mshearts Help and Support- helpctr
  • HyperTerminal- hypertrm
  • Iexpress Wizard- iexpress
  • Indexing Service- ciadv.msc
  • Internet Connection Wizard- icwconn1
  • Internet Explorer- iexplore Internet Setup Wizard- inetwiz
  • Internet Properties- inetcpl.cpl

Home » Unlabelled » Windows XP activation and validation tool | Crack 100% Working Windows XP activation and validation tool | Crack 100% Working Posted by Kamran Khan at 7:01 PM Share on Twitter Share on Facebook Share on StumbleUpon Share on Delicious Share on Digg Share This! Some of Microsoft sotware such as Security Essentials requires validation and you can't install some software without valid Operating System.Well now you can.I made small registry hack and all you have to do is to run it nad than you have Valid Windows XP.Inside this archive i also zipped two activators for Windows XP. 1.Installation instructions are inside archive 2.Have fun 3. If U Like the Post Comments me Please...! Thanks Windows XP activation and validation tool Download

0

Windows XP activation and validation tool | Crack 100% Working

Some of Microsoft sotware such as Security Essentials requires validation and you can't install some software without valid Operating System.Well now you can.I made small registry hack and all you have to do is to run it nad than you have Valid Windows XP.Inside this archive i also zipped two activators for Windows XP.
1.Installation instructions are inside archive
2.Have fun
3. If U Like the Post Comments me Please...!  Thanks 

Fix Window Xp Activation Loop [With 3 Simple Methods]

0

Fix Window Xp Activation Loop [With 3 Simple Methods]

Fix Window Xp Activation Loop [With 3 Simple Methods]
Do you encounter a windows XP activation loop? Where it continually ask you to activate windows, but the activation wizard will tells you that it is already activated or you face the problem of loggin on and when you click yes it returns back to the logon screen.


I have Three methods to solve this Problem:  


  • Method 1:


If you Face the above problem show in image or if you receive the activation 
loop as show here, you can bypass with the following steps.

  • First reboot into safe-mode with command prompt(by tapping F8 repeatedly
       when u boot the system).
  • type "explorer.exe" in dos window and click enter
       close dos window and click on start.
  • Type in exactly: rundll32.exe syssetup,SetupOobeBnk (and click OK)
(note: one space, after "rundll32.exe " also the Oo are two letter o's in "oobe"; capitals and comma are important)
  • Wait a couple of seconds (although you will Not see any change)
  •  Restart your PC normally (Start - Shutdown - Restart - Ok)
  • You are now able to go to Normal Mode again (For another 30 days !!!)      


  • Method 2:

What you need:
 Untouched Windows XP Disc Installer or Original/Backup copy of  windows XP  Disc

I always encounter this problem everytime I repair-install a Windows XP system. So here is what I did to fix the problem. First restart your PC then

1.) Log onto Windows using SAFEMODE with command prompt.
2.) Wait until the windows boot then Type "explorer" in the command prompt.
3.) Explore Windows XP CD and copy the TOOLS folder (located at support folder) to C:\
4.) In the TOOLS folder extract the DEPLOY.cab (this will create a new folder called deploy).
5.) Open the DEPLOY folder and run SYSPREP.
6.) Click FACTORY button. Notice that your PC will shut down.
7.) Power on your PC and wait till the windows desktop screen appear.
8.) Once finish Click RESEAL button and wait. Notice that your PC will shut down again.
9.) Power on again your PC and your done.


  • Method 3:  (Try this method at your own risk )
  • Insert the Windows XP startup disk into the floppy disk drive, or insert the 
         Windows XP CD-ROM into the CD-ROM drive, and then restart the computer. 
  • Click to select any options that are required to start the computer from the 
          CD-ROM drive if you are prompted to do so.
  • When the "Welcome to Setup" screen appears, press R to start the Recovery Console.
  • If you have a dual-boot or multiple-boot computer, select the installation that 
          you want to access from the Recovery Console.
  • When you are prompted to do so, type the Administrator password. 
  • If the administrator password is blank, just press ENTER.
  • At the Recovery Console command prompt, type the following lines, 
           pressing ENTER after you type each line:


md tmp


      copy c:\windows\system32\config\system c:\windows\tmp\system.bak

       copy c:\windows\system32\config\software c:\windows\tmp\software.bak


       copy c:\windows\system32\config\sam c:\windows\tmp\sam.bak

      copy c:\windows\system32\config\security c:\windows\tmp\security.bak

       copy c:\windows\system32\config\default c:\windows\tmp\default.bak


   delete c:\windows\system32\config\system

delete c:\windows\system32\config\software

delete c:\windows\system32\config\sam

delete c:\windows\system32\config\security

delete c:\windows\system32\config\default


copy c:\windows\repair\system c:\windows\system32\config\system

copy c:\windows\repair\software c:\windows\system32\config\software

copy c:\windows\repair\sam c:\windows\system32\config\sam

copy c:\windows\repair\security c:\windows\system32\config\security

copy c:\windows\repair\default c:\windows\system32\config\default

  • Type exit to quit Recovery Console. Your computer will restart.
Note: This procedure assumes that Windows XP is installed to the C:\Windows folder. 
Make sure to change C:\Windows to the appropriate windows_folder if it is a different location.

If you have access to another computer, to save time, you can copy the text in step five, and then 

create a text file called "Regcopy1.txt" (for example). To use this file, run the following command
 when you start in Recovery Console:
batch regcopy1.txt
With the batch command in Recovery Console, you can process all the commands in a text file sequentially. 
When you use thebatch command, you do not have to manually type as many commands.

How To restore the registry in Windows XP

0

How To restore the registry in Windows XP


Use System Restore to undo registry changes in in Windows XP

  1. Click Start, click Run, type %SystemRoot%\System32\Restore\Rstrui.exe, and then click OK.
  2. On the Welcome to System Restore page, click Restore my computer to an earlier time (if it is not already selected), and then click Next .
  3. On the Select a Restore Point page, click the system checkpoint. In the On this list select the restore point area, click an entry that is named "Guided Help (Registry Backup)," and then click Next. If a System Restore message appears that lists configuration changes that System Restore will make, click OK.
  4. On the Confirm Restore Point Selection page, click Next. System Restore restores the previous Windows XP configuration and then restarts the computer.
  5. Log on to the computer. When the System Restore confirmation page appears, click OK..

Free Beautiful Themes For windows XP 2013

0

Free Beautiful Themes For windows XP

Hiiii Guys,
Do you know what I hate most about Windows XP? It's look. It's painful combination of blue and green. So one of the first thing I do after every Windows install is patch the Uxtheme file so that I can apply a visual style of my choice.
The following is a list of some of the choicest visual styles that can give Windows XP a total makeover. Pick any!
Note: This list contains only shell styles that can be applied directly by patching Uxtheme or throughStyleXP. No Window Blinds skins here.I have given the installation Instructions at the Bottom.
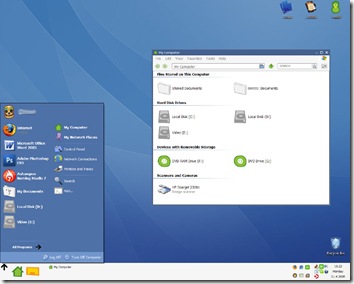
Watercolor Arrow - This theme looks so cool with a light colored taskbar, blue menu and funny hand-drawn type icons.
Watercolor_Arrow_by_pigmonkey2
download_button

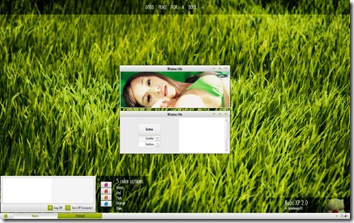
Kupo XP 2.0 - A very minimalistic design available in 5 colors.
Kupo_XP_2_0_by_lassekongo83
 download_button

Luder
 -  Another minimalistic theme with a clean green look.
Luder_for_XP_by_lassekongo83
 download_button

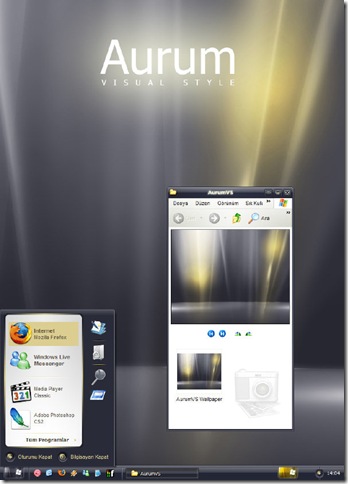
Aurum VS 1.1
 - A bit of Vista's Aurora look.
Aurum_VS_1_1_by_GeorgeHarrison
 download_button

Delta VS
 - A silver gray theme with mild colors.
Delta_VS_by_OmART
 download_button

DUO
 - A mixture of Vista and Mac.
DUO_by_GensouRay
  download_button

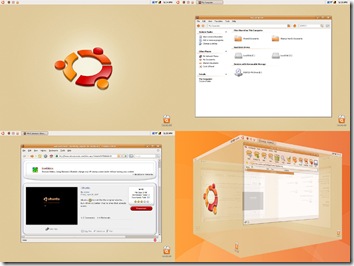
Ubuntu XP
 - This is the closest Windows XP can get to Ubuntu! Brilliantly done.
Ubuntu_XP_by_ShamusHand
  download_button


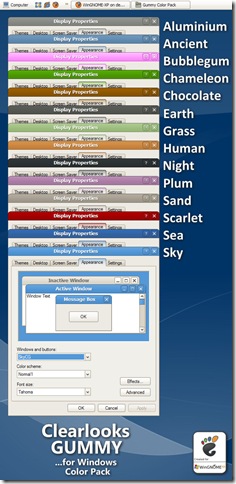
Clearlooks Gummy
 - This theme pack gives a "Gnome" look to Windows XP. Available in 14 different colors!
Clearlooks_Gummy___Colors_by_WinGNOME_XP
  download_button

Cadoo Visual Style 1.0 - A smooth whitish theme that gives a great contrast to any icon set.
Cadoo_Visual_Style_1_0_by_icube001
  download_button

animus -  A Mac like blue and white theme that works great with Mac icon set.
animus_by_chiwou
download_button

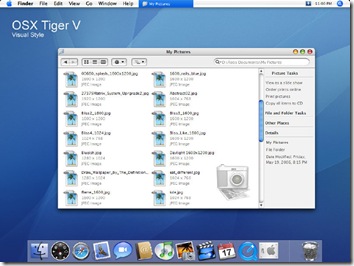
OSX Tiger V
 - Give Windows the Mac look. Very nicely done.
OSX_Tiger_V_visual_style_by_dobee
download_button

Leopard X
 - Another Mac theme with a slightly darker look.
Leopard_X_by_kspudw
download_button

VistaPerfection X4
 - One of the best looking Vista theme for Windows XP.
VistaPerfection_X4_Msstyles_by_kayeirene
download_button

Dream LH 1.0
 - Another theme with the Vista look, but darkish and black  explorer window and task panel.
Dream_LH_1_0_by_deskmundo
download_button

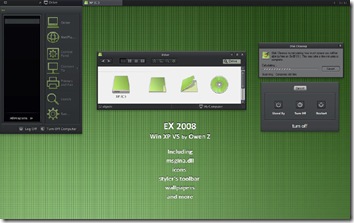
EX2008 Visual Style
 - A darkish theme with a tinge of green. Very minimalistic.
EX2008_Visual_Style_by_alocal
download_button

SlanXP 2.0
 - Another dark theme for Windows XP.
SlanXP_2_0_by_lassekongo83
download_button

GAIA
 - A very simple yet elegant theme with mild colors.
GAIA_VS_by_novoo
download_button

Greenius.VS
 - Another beautiful green theme. (Green seems to be the preferred color for designers)
Greenius_VS_for_GAIA_1_1_by_aMADme
download_button
This is how to install the themes:
1. Download and install Uxtheme patcher. During install a message will be displayed that important Windows file are being replaced and will ask you to insert the windows CD to fix it. Just ignore and click "continue"
2. Download the theme pack and copy the folder containing .msstyles and shellstyle.dll (this is inside another folder) to C:\WINDOWS\Resources\Themes\
3. After this is done, right-click on desktop and click Properties. Now click on the Appearance tab. UnderWindows and Buttons you will find the list of all the themes you installed. Select one from the list and click Apply.
Sometimes, the downloaded pack contains additional utilites like Styler and Rocketdock etc to bring other changes to Windows. It's up to you whether you want to install the additional stuff. You can visit the original page of the theme author for more instruction on how to use those.

How to Speedup Internet with Top 10 Public DNS Servers

0

How to Speedup Internet with Top 10 Public DNS Servers

Hi guys,
Today let's see about another working internet speedup trick. There are many tips and tricks available to speedup the internet connection. Already we have discussed many tricks to speedup internet connection. Today we will see how to speedup internet connection with top 10 high speed DNS servers.

Nowadays DNS servers have become a most important part in internet connection's speed. Sometimes you might see dongle's strength is in very good condition but the internet speed would be less. This all happen because of DNS servers. When you are using the default DNS provider from your ISP, it will be a slow access. You can speedup internet connection by using high speed DNS providers.


How to Speedup Internet with Top 10 Public DNS Servers

Here I have listed you the top 10 high speed public DNS servers.

TOP 10 DNS SERVERS
Level3:
Preferred DNS server - 209.244.0.3
Alternate DNS server - 209.244.0.4

Google:
Preferred DNS server - 8.8.8.8
Alternate DNS server - 8.8.4.4
ScrubIT3:
Preferred DNS server - 67.138.54.120
Alternate DNS server - 207.225.209.77

OpenNIC4:
Preferred DNS server - 69.164.208.50
Alternate DNS server - 216.87.84.211

Public-Root5:
Preferred DNS server - 199.5.157.131
Alternate DNS server - 208.71.35.137

Comodo DNS:
Preferred DNS server - 8.26.56.26
Alternate DNS server - 8.20.247.20

OpenDNS:
Preferred DNS server - 208.67.222.222
Alternate DNS server - 208.67.220.220

DNS Advantage:
Preferred DNS server - 156.154.70.1
Alternate DNS server - 156.154.71.1

Norton DNS:
Preferred DNS server - 198.153.192.1
Alternate DNS server - 198.153.194.1

SmartViper:
Preferred DNS server - 208.76.50.50
Alternate DNS server - 208.76.51.51


How to Speedup Internet connection with Top 10 High Speed Public DNS Servers?

Go to Control Panel
Then go to Network and Sharing Center
Click on Local Area Connection


Then click on Properties


After that, Select Internet Protocol Version 4 (TCP/IPv4) and click on Properties 
                                               OR
Double Click on Internet Protocol Version 4 (TCP/IPv4)


Now click on Use the following DNS addresses and change it as follows. Use any of above mentioned public DNS servers.

For exmple:


Then click on OK,
That's all you have done successfully !!

Windows Keyboard Shortcuts Key

0

Keyboard Shortcuts, must read

Getting used to using your keyboard exclusively and leaving your mouse behind will make you much more efficient at performing any task on any Windows system. I use the following keyboard shortcuts every day:

Windows key + R = Run menu

This is usually followed by:
cmd = Command Prompt
iexplore + "web address" = Internet Explorer
compmgmt.msc = Computer Management
dhcpmgmt.msc = DHCP Management
dnsmgmt.msc = DNS Management
services.msc = Services
eventvwr = Event Viewer
dsa.msc = Active Directory Users and Computers
dssite.msc = Active Directory Sites and Services
Windows key + E = Explorer

ALT + Tab = Switch between windows

ALT, Space, X = Maximize window

CTRL + Shift + Esc = Task Manager

Windows key + Break = System properties

Windows key + F = Search

Windows key + D = Hide/Display all windows

CTRL + C = copy

CTRL + X = cut

CTRL + V = paste

Also don't forget about the "Right-click" key next to the right Windows key on your keyboard. Using the arrows and that key can get just about anything done once you've opened up any program.


Keyboard Shortcuts

[Alt] and [Esc] Switch between running applications

[Alt] and letter Select menu item by underlined letter

[Ctrl] and [Esc] Open Program Menu

[Ctrl] and [F4] Close active document or group windows (does not work with some applications)

[Alt] and [F4] Quit active application or close current window

[Alt] and [-] Open Control menu for active document

Ctrl] Lft., Rt. arrow Move cursor forward or back one word

Ctrl] Up, Down arrow Move cursor forward or back one paragraph

[F1] Open Help for active application

Windows+M Minimize all open windows

Shift+Windows+M Undo minimize all open windows

Windows+F1 Open Windows Help

Windows+Tab Cycle through the Taskbar buttons

Windows+Break Open the System Properties dialog box


acessability shortcuts

Right SHIFT for eight seconds........ Switch FilterKeys on and off.

Left ALT +left SHIFT +PRINT SCREEN....... Switch High Contrast on and off.

Left ALT +left SHIFT +NUM LOCK....... Switch MouseKeys on and off.

SHIFT....... five times Switch StickyKeys on and off.

NUM LOCK...... for five seconds Switch ToggleKeys on and off.

explorer shortcuts

END....... Display the bottom of the active window.

HOME....... Display the top of the active window.

NUM LOCK+ASTERISK....... on numeric keypad (*) Display all subfolders under the selected folder.

NUM LOCK+PLUS SIGN....... on numeric keypad (+) Display the contents of the selected folder.

NUM LOCK+MINUS SIGN....... on numeric keypad (-) Collapse the selected folder.

LEFT ARROW...... Collapse current selection if it's expanded, or select parent folder.

RIGHT ARROW....... Display current selection if it's collapsed, or select first subfolder.


Type the following commands in your Run Box (Windows Key + R) or Start Run

devmgmt.msc = Device Manager
msinfo32 = System Information
cleanmgr = Disk Cleanup
ntbackup = Backup or Restore Wizard (Windows Backup Utility)
mmc = Microsoft Management Console
excel = Microsoft Excel (If Installed)
msaccess = Microsoft Access (If Installed)
powerpnt = Microsoft PowerPoint (If Installed)
winword = Microsoft Word (If Installed)
frontpg = Microsoft FrontPage (If Installed)
notepad = Notepad
wordpad = WordPad
calc = Calculator
msmsgs = Windows Messenger
mspaint = Microsoft Paint
wmplayer = Windows Media Player
rstrui = System Restore
netscp6 = Netscape 6.x
netscp = Netscape 7.x
netscape = Netscape 4.x
waol = America Online
control = Opens the Control Panel
control printers = Opens the Printers Dialog